Use webhookd to Create Custom Webhooks
Table of Contents
Backstory
There are multiple scenarios in my homelab where I want to trigger some action or send myself a notification after a task completes or a warning is displayed.
One example in my environment is publishing files to a directory for production use after a specific git push action takes place. I needed a solution that would connect to the appropriate directories and transfer files, but only when a trigger is called. Based on the capabilities of my git server[1], I decided to leverage its ability to call a webhook on specific events.
Creating Custom Webhooks
I quickly discovered a server application called webhookd, which easily allows you to run shell scripts when a URL is called (GET or POST request). It supports reading the body of a POST request. The path to your shell script will mirror the URL it can be accessed from. Development of the project is still active, as of 8/13/2024.
Running Webhookd
As with most of my homelab applications, I opted to spin up a container[2] for webhookd.
The relevant pieces of configuration:
-
Create volumes for the scripts directory and the production files directory. You may also want to create a volume for the environment file.
-
Specify network configuration. I use Traefik with labels, so I only need to "expose" the port instead of mapping it to the host, and can reach it via a subdomain. I can also use Traefik to restrict the network addresses that can access the container, which is useful for securing webhooks that should only be accessed by server applications.
Create Scripts
Next, you need to create the scripts that should be run. In my example, the webhook from Forgejo sends a JSON body. The body of a request can be accessed in shell scripts with the $1 variable. To parse the JSON, I am using jq with parsing specific to the request body[3].
The request body that Forgejo sends on a push event to a specific branch looks similar to the following (values replaced with <> and several lines cut with ...):
"ref": "refs/heads/<BRANCH_NAME>",
...
"commits": ,
"repository":
The relevant bits for us are the full name of the repository and the URL of the repository. So we can use the following jq query:
{name: .repository.full_name, repo_url: .repository.clone_url }
Now let's put it to use in our shell script:
#!/bin/bash
if [; then
else
JSON_INFO=
REPO_NAME=
REPO_URL=
fi
The script first checks to make sure a POST body has been included, then checks if the repository matches a predefined list (with case), and copies the files to the appropriate location.
In my actual script, I have other tasks run after the copy operation to make the files live in production. I also escape cp (as \cp) to ensure the real cp command is used, and not an alias.
Be sure to mark the script as executable (chmod +x) and add any other required permissions.
Kick off Scripts
The last thing to do is send data to webhookd so it can execute the script!
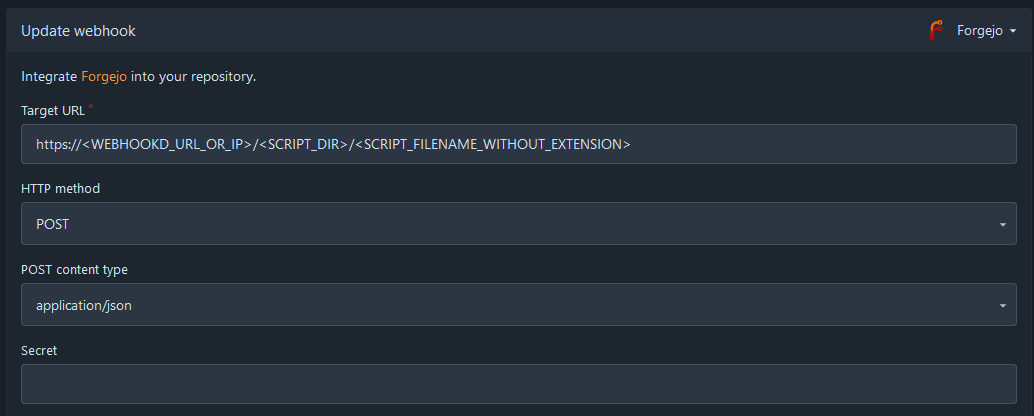
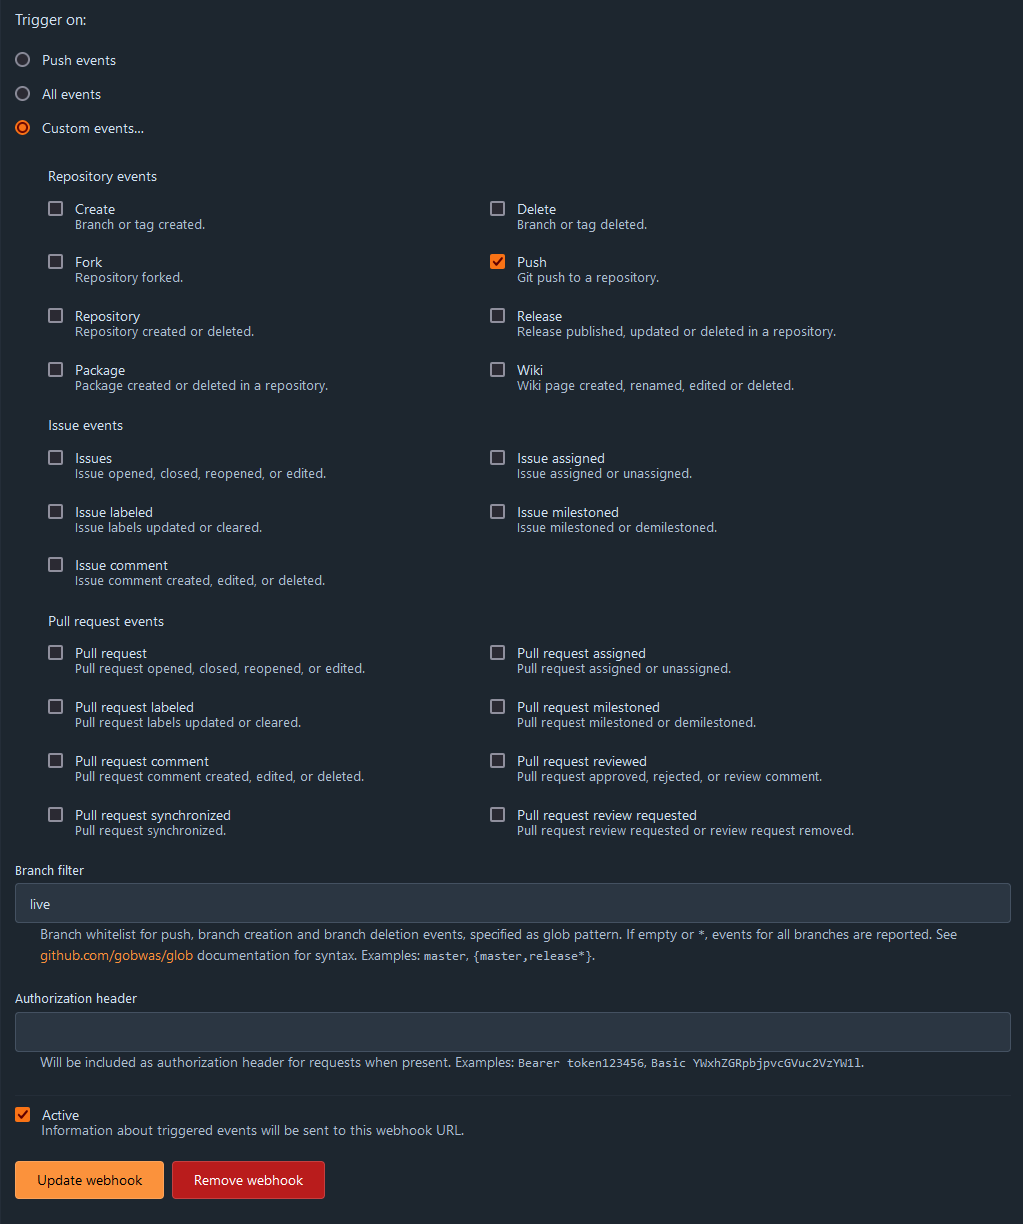
Configure the webhook as follows, assuming you only want to send it when there is a push to the "live" branch. Note that the type of webhook is specified in the top right. (Forgejo in my case, Gitea would be the name for Gitea. Other hosts may need additional configuration.)


If you need to debug your webhook, you can see a list of executions below the webhook configuration, and view details on what was sent and the status that was receieved.
Potential Improvements
One thing I would like to implement later is a lock file that will restrict modification by the script if a previously executed job is already running.
For some of my webhook calls, I may also add notifications through the ntfy service I have running.
Summary / TL;DR
If you are looking to build custom webhooks, webhookd is a great server application to do so easily, assuming you are comfortable with bash scripting.
I provided an example of how it can be used to integrate with a git repository as a type of CI/CD[4]. My example leveraged the jq CLI application to parse JSON before passing it to the main bash script.
Disclaimer
Some of the configuration I utilize does not follow "best pratices" and may not be the most efficient or secure way to do things. You should always secure your network at multiple levels, and research other potential solutions that may work better in your environment than they do in mine.
Commentary
If you have any thoughts on this article that you would like to share, please send me an email at [email protected] and I will get back to you. If new information is provided, I will update the article accordingly.
-
I use Forgejo, and my examples should also work with Gitea. You may have to make adjustments to use this with GitHub, GitLab, or other git repository hosts. ↩
-
I use Podman to run containers, and create Ansible playbooks to start them with the neccessary environment variables, volumes, etc. You can do the same thing with Docker and docker-compose files, if you prefer. ↩
-
jq can be difficult to debug live. I utilized jqplay to test what the command would return. This site is similar to RegExr for regular expressions or Codepen for web rendering of HTML/CSS/JS. ↩
-
CI/CD stands for continuous integration and continuous delivery/deployment. You will likely want to include other steps in your CI/CD, which I use Forgejo Actions to achieve. ↩